Hier ein Tutorial auf englisch aus dem Forum von NativeInstruments von hier.
Das Tutorial bezieht sich auf die Konfiguration am Mac und reactivision in Verbindung mit Reaktor von NativeInstruments. Hier wird erklärt wie man reactivision dazu bekommt ein midi Signal zu senden, um es dann in einem Sound-Programm weiter zu verwenden.
1. Download reacTIVision 1.3 for OS X from http://www.iua.upf.es/mtg/reacTable/?software
2. Put the reacTIVision-1.3 folder somewhere sensible (I'll assume you've put it in your home folder for the rest of this list)
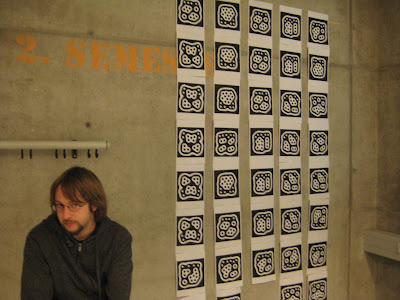
3. Print out the "fiducials". These are mysterious black-and-white ameoba-like icons that trigger the reacTIVision software. They've been designed by simulated evolution. No really. The file you want to print out is in your home folder/reacTIVision-1.3/symbols/default.pdf . Eventually, you'll want to cut these up and glue them to the bottom of the objects that you'll be moving around the surface of your ReakTable. For the moment you'll just be waving them around in front of your isight...
4. You can run the reacTIVision app by clicking on it. This will let you choose your camera (I only have the built in isight at the moment), and you'll see video of yourself as if in a dream sequence from a psychedelic black and white TV show of the 1960s. This is normal.
The standalone app will now be sending OSC signals across your network. These can be used in Reaktor (presumably) but I haven't got into that yet. So... I wanted to use MIDI instead - luckily this is pretty straightforward. Close down the app for now.
5. To get reacTIVision to send MIDI, first make sure you have the internal midi device up and running. Open the Audio/MIDI setup app from your utilities folder and enable the IAC midi driver.
6. There's a setup file you can use to specify what MIDI signals you want sent for the various fiducial icons. An example file is available in your home folder/reacTIVision-1.3/midi/demo.xml. For this first test, just create a new "test.xml" file in your home folder using a text editor. Here's an example:
map fiducial="3" type="vfader" control="30" min="0.2" max="0.8"
map fiducial="3" type="hfader" control="31" min="0.2" max="0.8"/
map fiducial="3" type="knob" control="32" min="0.0" max="1.0"/
map fiducial="3" type="note" note="30"/
map fiducial="4" type="vfader" control="40" min="0.2" max="0.8"/
map fiducial="4" type="hfader" control="41" min="0.2" max="0.8"/
map fiducial="4" type="knob" control="42" min="0.0" max="1.0"/
map fiducial="4" type="note" note="40"/
What this does is map the positions and rotations of fiducials 3 and 4 to various midi controls. In addition, a midi note will be held whenever the fiducial is on screen (the numbers I chose are arbitrary). I use the midi notes to trigger loops in Ableton Live (make sure your clips are set to "gate", then they'll play when the fiducial is in view and stop when its not). The "max" and "min" lines tell reacTIVision to concentrate on the middle of the camera's field of view so that you don't need to move the fiducial right to the edge to get the full range of your controller.
7. To get reacTIVision to output midi using your xml file, you need to run it from the command line rather than clicking on the app. Start a terminal and enter the following command:
./reacTIVision-1.3/reacTIVision.app/Contents/MacOS/reacTIVision -m test.xml
8. Start up reaktor and make sure it's set to get midi input from the internal midi driver. You can now set up midi input on ensemble controls to the controllers defined in your xml file. (For example, right click on a control, go to properties, select the fourth tab, activate midi in, and enter controller number 30. This parameter will now be controlled by the vertical position of fiducial 3.)
Although this way of doing things with MIDI is pretty easy, I'm probably going to switch to OSC and design a reaktor ensemble that does the mapping from OSC to midi (to control other reaktor instruments and/or ableton live). I'm also planning to have a display in the ensemble that shows the position of the currently visible fiducials, although that may have to wait a bit.
It's lots of fun already, but obviously you don't get the amount of control that you would with the under-table setup that reactable uses. I have a lot of unanswered questions about the hardware side of things that I'm worried about (like how can I best choose a camera that won't blur the fiducials as they move? how do you know if a camera will be sensitive enough in infra red so that won't get disturbed by video projections onto the same surface etc.)
Mittwoch, 21. Januar 2009
Impressionen
getting started --> Tutorial
Wenn ihr jetzt auch Lust bekommen habt mit rectivision zu experimentieren, wollen wir euch den Anfang etwas erleichtern. Im folgenden wird erklärt wie man es mit reactivision und processing schafft, dass sich überhaupt mal was tut.
- TuioDemo.pde speichern
- schliesse processing
- TuioDemo.pde nochmals mit processing öffnen
- starten (Str-R oder Apfel-R)
- öffne reactivision
- spiele mit einem fiducial vor der Kamera, nun müsste in processing ein schwarzes Quadrat erscheinen, dass sich syncron mit dem fiducial bewegt.
weiteres vorgehen:
- entdecke den processing code
- ändere etwas
- starte den patch nochmal
- spiele mit den fiducials
- and start again...
Schritt 1: Software
Lade dir hier die reactivision software runter und den dazugehörigen processing-patch. Unter "reacTIVision client examples" "TUIO_Processing.zip" runterladen. Außerdem brauchst du noch das Programm "processing", mit dem dann die visuelle Ausgabe von statten geht. Das kann unter http://www.processing.org runtergeladen werden.
Schritt 2: Kamera und fiducials
Um mit reactivision experimentieren zu können benötigst du eine Kamera. Für den Anfang reicht schon eine stinknormale Webcam oder auch die I-Sight-Cam, die in den Macs vorinstalliert ist. Nun brauchst du noch die fiducials, die optischen Marker, die dann von reactivision erkannt werden. Die sind bei der reactivision-Software in einer pdf-Datei dabei. Einfach ausdrucken und mal ein/zwei ausschneiden.
Schritt 3: Einstellungen
- installiere processing
- kopiere den TUIO_Processing Ordner in die processing-Datenbank (processing Heim-Ordner)
- finde die Datei TuioDemo.pde und öffne sie mit processing - TuioDemo.pde speichern
- schliesse processing
- TuioDemo.pde nochmals mit processing öffnen
- starten (Str-R oder Apfel-R)
- öffne reactivision
- spiele mit einem fiducial vor der Kamera, nun müsste in processing ein schwarzes Quadrat erscheinen, dass sich syncron mit dem fiducial bewegt.
weiteres vorgehen:
- entdecke den processing code
- ändere etwas
- starte den patch nochmal
- spiele mit den fiducials
- and start again...
reacTable - der Ursprung
Die reactivision-Software wurde von ihren Machern Martin Kaltenbrunner und Ross Bencina in der Music Technology Group an der Universität Pompeu Fabra in Barcelona im Rahmen des reacTable-Projekts entwickelt.
Der reacTable ist ein echt abgefahrenes Teil, mit dem mit Hilfe von den fiducials Musik auf einem speziell konstruierten Tisch machen kann. Schaut euch das Video unten an und ihr werdet merken wie viel potential in diesem OpenSource-Projekt steckt...
Zur Erklärung:
Unterhalb des Tisches auf dem die fiducials bewegt werden, ist eine Kamera installiert, die mit Hilfe von reactivision die Bewegungen abfängt und über das TUIO-Protokoll an ein beliebiges Programm weitergibt. Dort werden die Signale weiterverarbeitet, in diesem Fall gibt es dann eine akustische Ausgabe (der Sound) und eine visuelle Ausgabe, die vom Beamer auf den Tisch projiziert wird.
Abonnieren
Posts (Atom)


